Building & Installing
Note
GGEMS is written in C++ and uses the OpenCL library. However, GGEMS can also be used by calling python v3 functions. Python is not mandatory, C++ is sufficient. Many examples in C++ and Python are written in this manual
Prerequisites
GGEMS is based on the OpenCL library. For each platform (NVIDIA, Intel and AMD), you must install the corresponding drivers.
NVIDIA
Linux & Windows
The NVIDIA driver as well as the CUDA library must be installed to use GGEMS on an NVIDIA platform. The recommended method for this installation is to download CUDA from the official NVIDIA website (https://developer.nvidia.com/cuda-downloads) and follow their instructions.
Warning
The CUDA library is not used by GGEMS. Only the OpenCL library provided with CUDA is used.
Warning
It is recommended to install CUDA yourself with the link provided by NVIDIA. On linux, the ‘apt’ program is very useful but can produce some inconvenience.
INTEL
Linux & Windows
To use GGEMS on an Intel platform (CPU or GPU) you must install the driver. For this it is recommended to install the driver provided by Intel oneAPI Base Toolkit (https://www.intel.com/content/www/us/en/developer/tools/oneapi/base-toolkit.html). The library will be installed with the Intel compiler and the other libraries.
AMD
Linux & Windows
The AMD platform has not yet been tested with GGEMS. The library should be compatible or only a few changes in the code should be made. The driver can be downloaded with the following link (https://www.amd.com/en/support). Do not hesitate to contact us if you need help compiling GGEMS on an AMD platform.
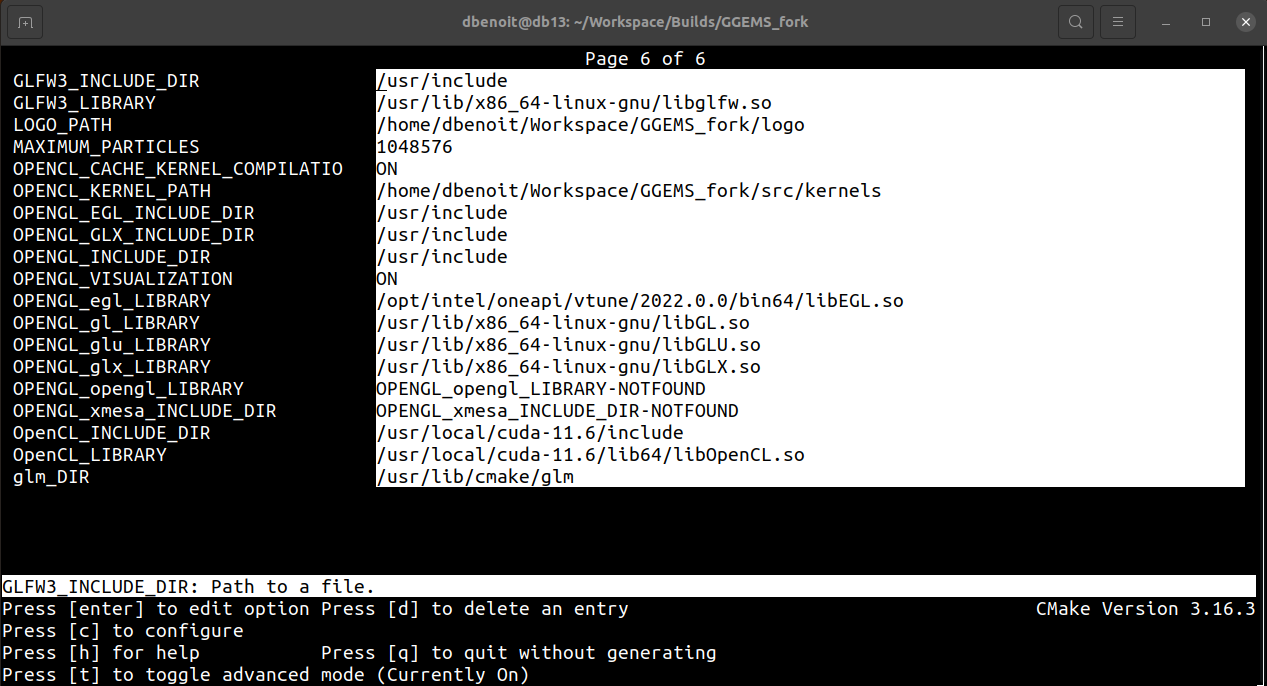
OpenGL visualization
Since version 1.2 of GGEMS, the OpenGL library can be used to visualize the simulation in 3D space. OpenGL can be used by both Windows and Linux. GGEMS is also based on 3 other libraries:
GLFW that is an Open Source, multi-platform library for OpenGL, OpenGL ES and Vulkan development on the desktop. It provides a simple API for creating windows, contexts and surfaces, receiving input and events.
GLEW that is a cross-platform open-source C/C++ extension loading library.
GLM that is a header only C++ mathematics library for graphics software based on the OpenGL Shading Language (GLSL) specifications.
Important
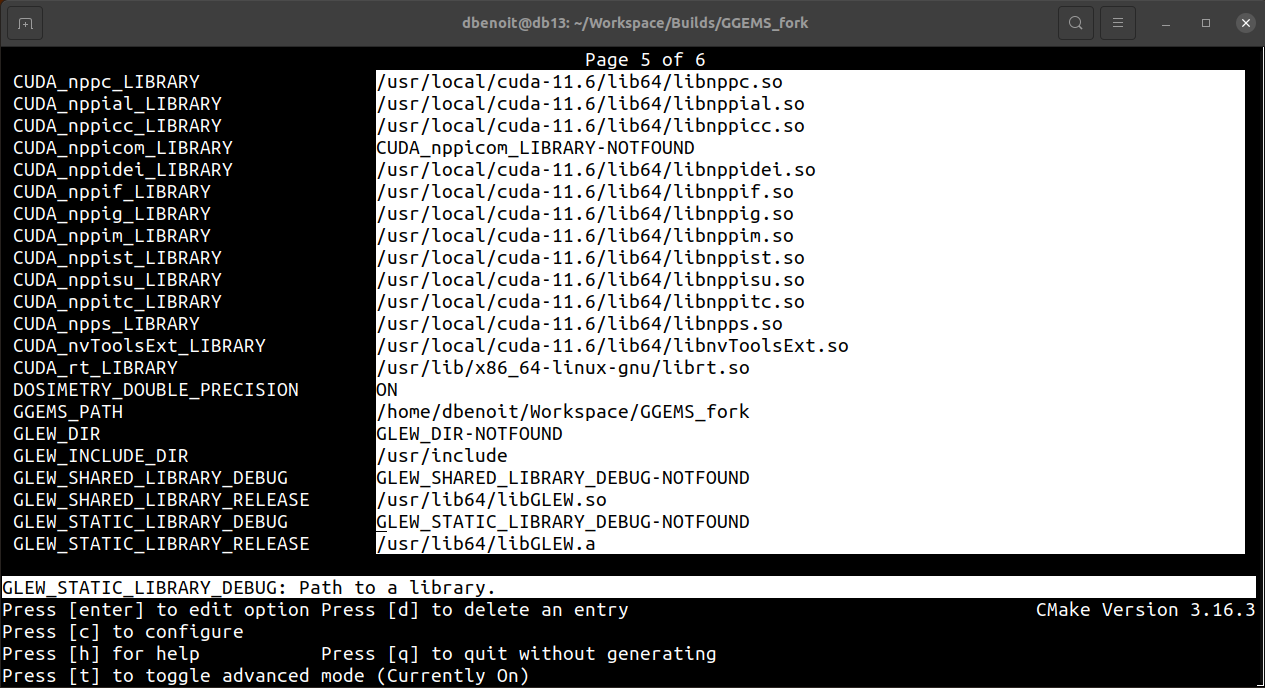
For linux users, GLEW library must be installed from source (glew-XXX.zip) (http://glew.sourceforge.net/). When activating OpenGL, it’s mandatory to link GGEMS and libGLEW.a static library.
Warning
For linux users, GLFW and GLM libraries can be installed using the ‘apt’ program for example.
Warning
For Windows users the libraries should be downloaded from their respective website and installed if possible in the standard location C:\Program Files (x86)
GGEMS Installation
CMAKE is required to install GGEMS. The minimum version of CMAKE is 3.13.
Linux
Cloning GGEMS using the following command:
$ git clone https://github.com/GGEMS/ggems.git
Creating a folder named GGEMS_build (or another name), and launch the command ‘ccmake’:
$ mkdir GGEMS_build
$ mkdir GGEMS_install
$ cd GGEMS_build
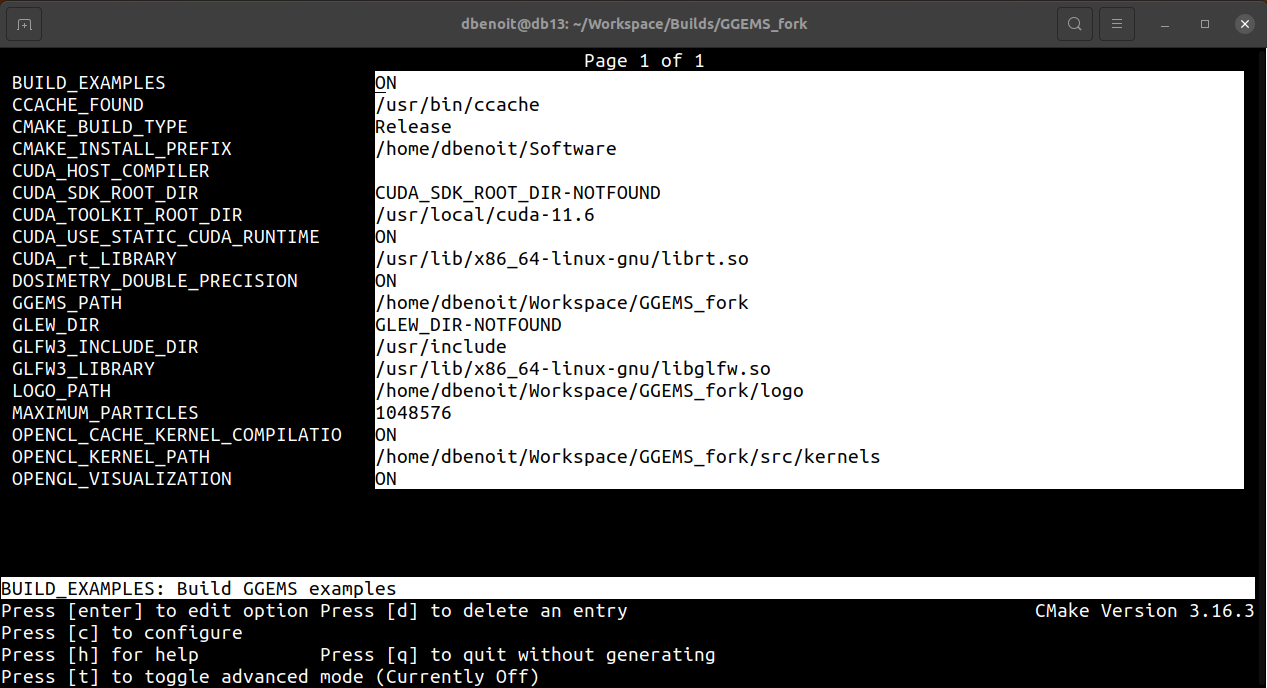
$ ccmake ../ggems
Note
By default, the GNU C++ compiler is used on Linux. LLVM CLANG or Intel DPC++/C++ can also be used. The compiler can be modify using the CMakeLists.txt file.
After checking the installation parameters in the CMAKE window, you can run the installation commands:
$ make -jN
$ make install
To be able to use GGEMS correctly in a linux console, you must enter the right values for the environment variables (in the .bashrc file for example on Linux)
export LD_LIBRARY_PATH=$LD_LIBRARY_PATH:YOUR_PATH/GGEMS_install/ggems/lib
export PYTHONPATH=$PYTHONPATH:YOUR_PATH/GGEMS_install/ggems/python_module
export PYTHONPATH=$PYTHONPATH:YOUR_PATH/GGEMS_install/ggems/lib
GGEMS is now installed on your machine. To verify the installation, you can try the examples or call GGEMS in a Python console.
from ggems import *
opencl_manager = GGEMSOpenCLManager()
opencl_manager.print_infos()
opencl_manager.clean()
exit()
Windows
Note
The following guide assumes you are using the Windows console (cmd.exe), power shell can also be used. Visual C++ is the default compiler.
Important
Only Visual C++ (CL), LLVM CLANG and Intel DPC++/C++ are validated on Windows. GNU GCC is not validated.
Visual C++ is assumed to be properly installed and configured on your computer. A simple batch script (for instance named set_mvsc.bat) allows you to configure Visual C++. The following example is configured for Visual Studio 2022.
@echo OFF
if "%VCTOOLKIT_VARS_ARE_SET%" == "true" goto done

echo --- Setting Microsoft Visual C++ Toolkit 2022 environment variables... ---

call "C:\Program Files\Microsoft Visual Studio\2022\Community\VC\Auxiliary\Build\vcvarsall.bat" x86_amd64

set PATH="%VCToolkitInstallDir%"\bin;%PATH%
set INCLUDE="%VCToolkitInstallDir%"\include;%INCLUDE%
set LIB="%VCToolkitInstallDir%"\lib;%LIB%

set VCTOOLKIT_VARS_ARE_SET=true
echo Done.
:done
The previous batch script can be launched with the command:
C:\Users\XXX> set_mvsc.bat
Cloning GGEMS using the following command:
$ git clone https://github.com/GGEMS/ggems.git
Creating a folder named GGEMS_build (or another name), and launch the command ‘cmake-gui’:
C:\Users\XXX> md GGEMS_build
C:\Users\XXX> md GGEMS_install
C:\Users\XXX> cd GGEMS_build
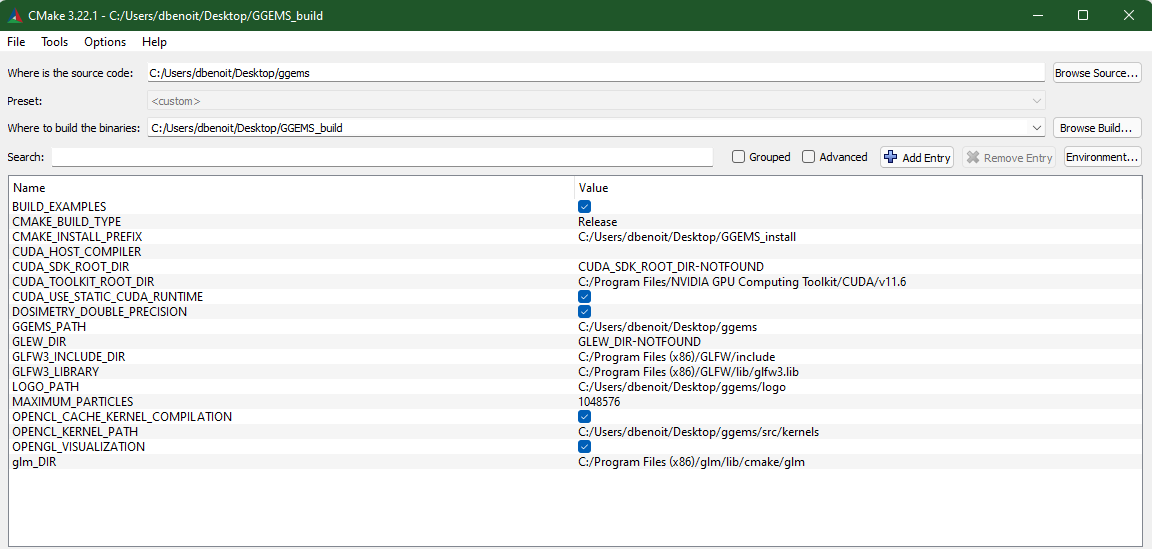
C:\Users\XXX\GGEMS_build> cmake-gui
Final step, compilation and installation using nmake or ninja.
C:\Users\XXX\GGEMS_build> nmake install
or
C:\Users\XXX\GGEMS_build> ninja install
Note
For multi-processor compilation it is recommended to use Ninja on Windows, NMake only using 1 processor.
To work correctly the PATH and PYTHONPATH environment variables must be initialized according to your installation path. This can be done by writing a simple batch file for example, here named set_ggems.bat.
@echo OFF
if "%GGEMS_VARS_ARE_SET%" == "true" goto done

echo --- Setting GGEMS... ---
set PYTHONPATH=%PYTHONPATH%;C:\Users\XXX\GGEMS_install\ggems\python_module
set PYTHONPATH=%PYTHONPATH%;C:\Users\XXX\GGEMS_install\ggems\lib
set PATH=%PATH%;C:\Users\XXX\GGEMS_install\ggems\lib

set GGEMS_VARS_ARE_SET=true
echo Done.
:done
GGEMS is now installed on your machine. To verify the installation, you can try the examples or call GGEMS in a Python console.
from ggems import *
opencl_manager = GGEMSOpenCLManager()
opencl_manager.print_infos()
opencl_manager.clean()
exit()
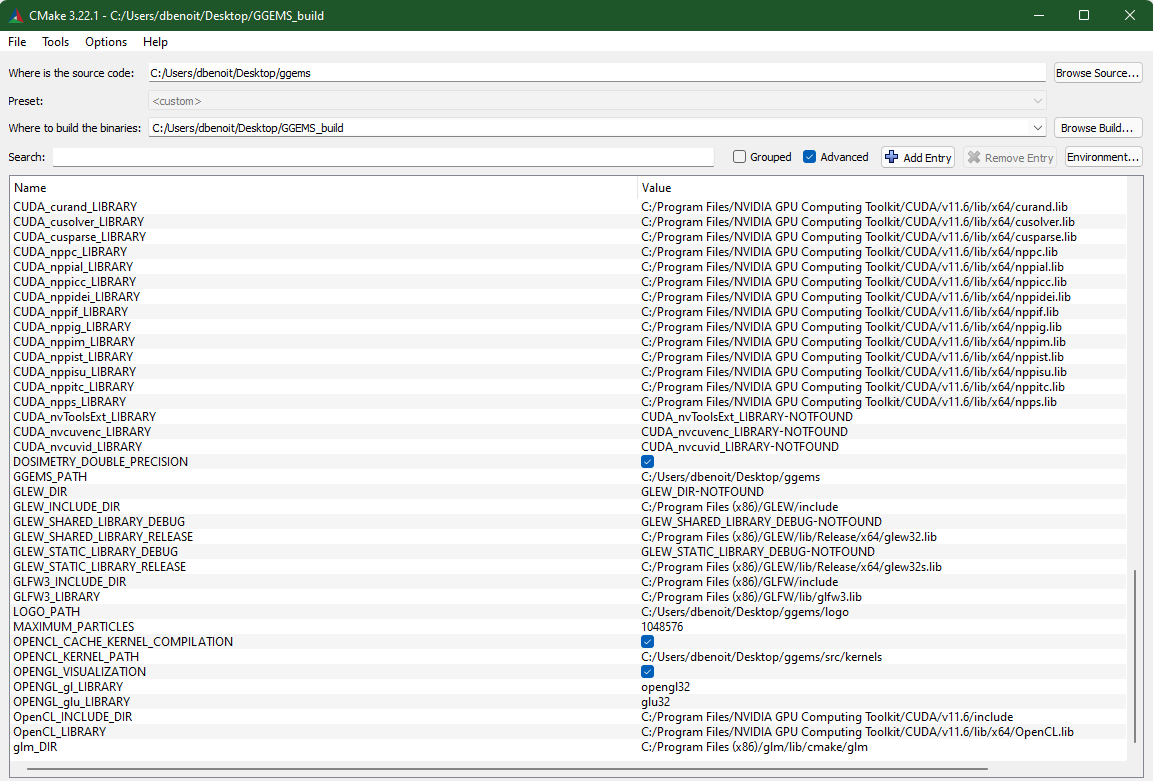
CMAKE GGEMS Parameters
BUILD_EXAMPLES
By default this option is initialized to ON. During the compilation of GGEMS, the examples will also be compiled and installed.
CMAKE_INSTALL_PREFIX
Path to your installation folder.
DOSIMETRY_DOUBLE_PRECISION
By default this option is initialized to ON. This is an option that only impacts the dose calculation for dosimetry applications. Double precision calculations in dosimetry are highly recommended.
MAXIMUM_PARTICLES
In the GGEMS library, a certain number of particles are simulated at the same time. By default this number is 1048576. Depending on the performance of the graphics card this number may be larger for better performance.
Important
It is important to understand that this number is not the number of particles simulated, but the number of particles simulated at the same time by the OpenCL kernels.
OPENCL_CACHE_KERNEL_COMPILATION
By default this option is initialized to ON. When compiling OpenCL kernels while GGEMS is running, the kernels are cached. If you need to modify the code yourself in OpenCL kernels it is recommended to set this variable to OFF.
OPENGL_VISUALIZATION
By default this option is initialized to OFF. If you want to visualize your simulation, initialize this variable to ON, GGEMS will then use the OpenGL library.